
SETUP
Welcome to the nLab setup guide! In under a minute, we’ll get you up and running.
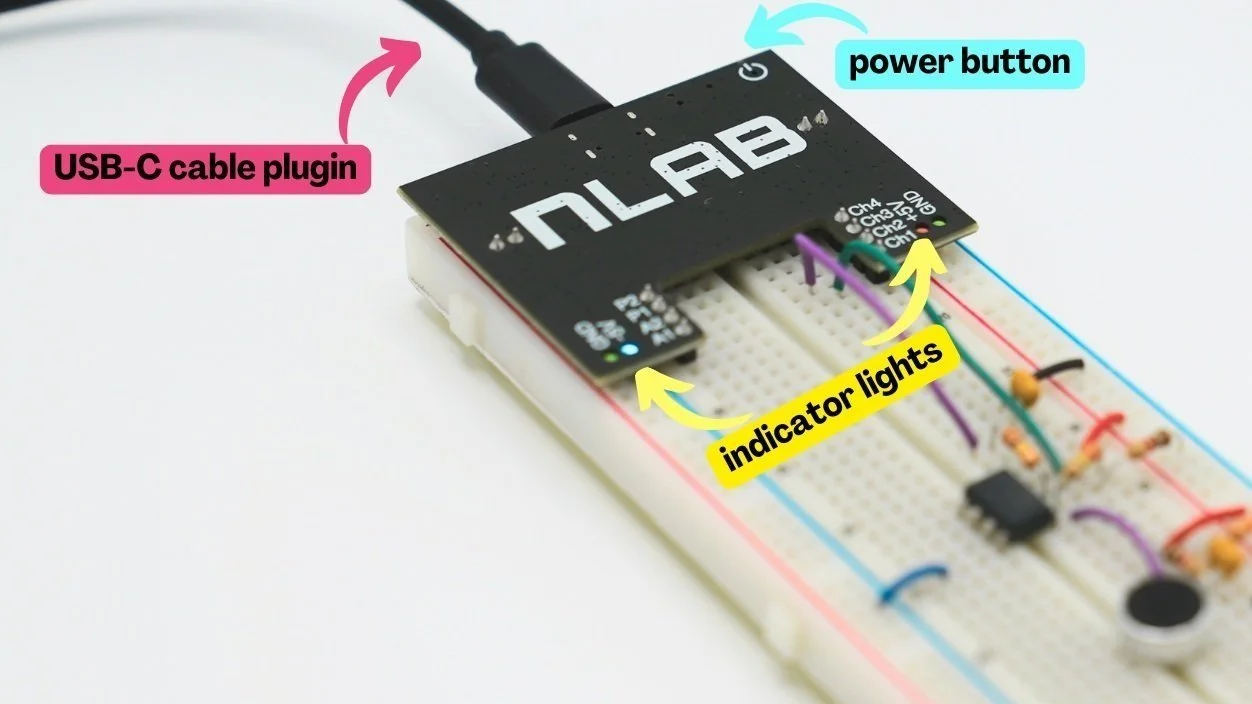
Set Up the nLab: Place the nLab on your breadboard, aligning it with the top, and push the pins in fully. Note: Your nLab likely arrives with this step already complete!
Connect to Power: Plug one end of the USB-C cable into the nLab and the other end of the cable into your computer. Green LEDs will light up, indicating the nLab is connected, but power isn't on yet.
Turn on Power: Press the button on the top right to power the nLab. Red and blue LEDs will turn on, showing your breadboard is powered.
Download the nLab App: Visit getnlab.com to download the nLab app, which lets you monitor and control your circuits.
App and Software Updates: Open the app on your computer. If the nLab's lights flash, it’s updating—once they stop, it's ready to go.
Safety Tip: Turn off power (green lights only) while building circuits to avoid short circuits and damage. Only power on when your circuit is ready.
Overload Protection: If the nLab detects too much power, it will automatically shut off, show a warning in the app and the green lights will flash. If there is too much power being used, there is likely something wrong with your circuit that needs fixing. If you can’t figure it out on your own, don’t worry! Reach out to info@getnlab.com — we’re here to help!
Safety Reminder: The nLab operates at low voltage and is designed to be safe for handling. We recommend avoiding the use of external power sources until you're comfortable with circuit design.